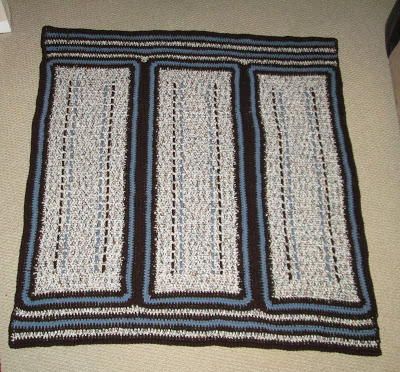
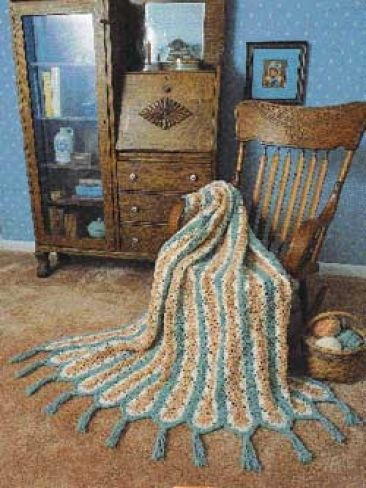
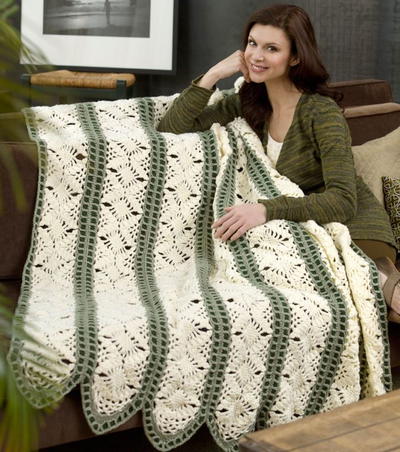
Fast Irish Panels Throw

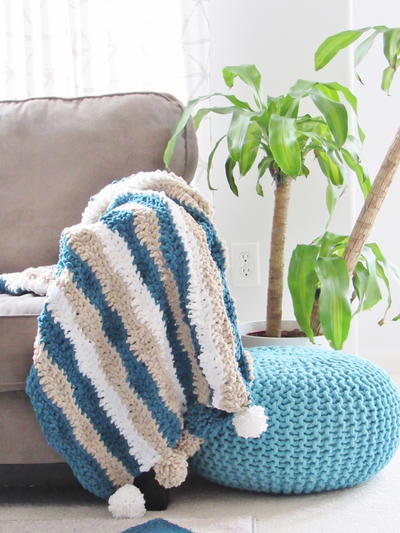
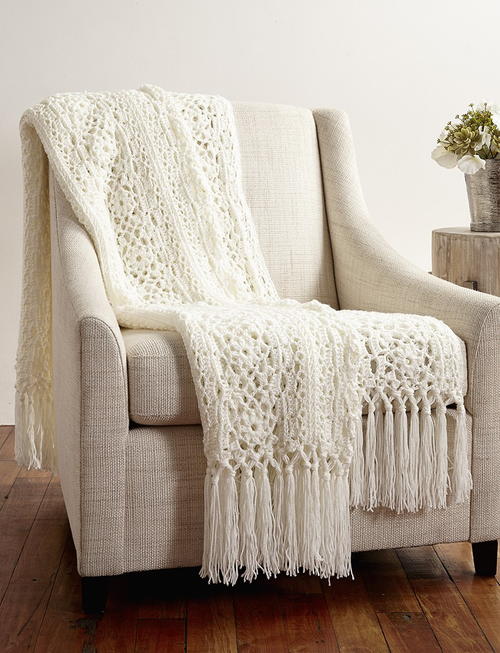
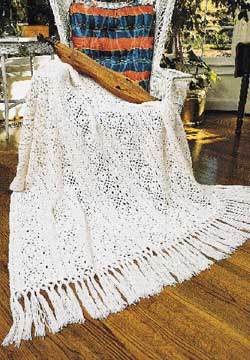
Create amazing flowery crochet lace patterns in no time! The Fast Irish Panels Throw has a classic panel format, making it perfect for travel. You can take this amazing mile-a-minute project wherever you go!
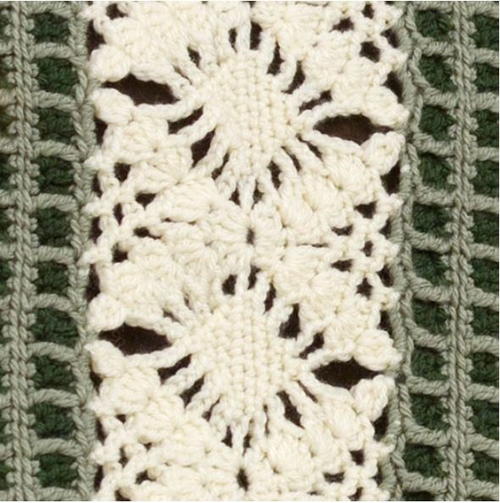
The intricate crochet shell stitch pattern gives these panels an elegant lace look that almost resembles crochet flowers. If you're interested in fast crochet projects, crochet blanket patterns like this one are just for you. With the help of this crochet tutorial, you'll be making these lacy diamonds in no time.
DID YOU KNOW?
Irish Crochet Lace helped to save Ireland’s economy in the mid-1800s? After the potato famine in Ireland, lace making became a craft that saved young, poor Irishwomen. Soon, Irish lace became a popular choice in major cities of the world including Paris, London, Dublin, and San Francisco. As popularity grew into the late 1800s it was added into furniture and wedding gowns. Renowned for its beauty, it’s no wonder the classic crochet lace patterns are still around today!
PLUS! Don't miss out on how you can crochet some super cute decorative edging by watching our video below on how to crochet the pointed scallop edging pattern.

Crochet HookH/8 or 5 mm hook
Yarn Weight(4) Medium Weight/Worsted Weight and Aran (16-20 stitches to 4 inches)
Crochet GaugeOne repeat of 14 sts = 4" in pattern; panel measures 8" wide. CHECK YOUR GAUGE. Use any size hook to obtain the gauge.
Finished Size56" x 72"
Materials List
- RED HEART® "Soft Yarn": 10 balls 4601 Off White A, 4 balls each 9623 Spearmint B and 9523 Dark Leaf C
- Hook: 5mm [US H-8]
- Yarn needle
Instructions for THROW:
-
PANEL
(Make 7)
With A ch 228.
Round 1 (Right Side): 2 Dc in 4th ch from hook, * ch 3, skip next 3 ch, sc in next 7 ch, ch 3, skip next 3 ch **, 5 dc in next ch; repeat from * to last ch, end at **; (3 dc, ch 5, 3dc) all in last ch; now work in remaining loops of beginning ch and repeat from * across, end at **; 3 dc in same ch as first 2 dc, ch 5; join with a slip st to top of ch-3.
Round 2: Slip st in next dc; (ch 3, 4 dc) all in same dc –beginning shell made; * ch 3, skip next sc, sc in next 5sc, ch 3, skip next dc; 5 dc in next dc –shell made **; ch3, skip next dc, shell in next dc; repeat from * across, end at **; † ch 5, 3 sc in ch-5 space, ch 5 †, skip next dc, shellin next dc; repeat from * across, end at **; repeat from † to†; join to ch-3.
Round 3: Slip st in next 2 dc, beginning shell in same dc,* ch 3, skip next sc, sc in next 3 sc, ch 3; shell in 3rd dc of next shell –shell over shell made **; ch 3, sc in ch-3 space, ch 3, shell over shell; repeat from * across, end at**; † ch 5, sc in ch-5 space, ch 5, sc in next sc, ch 5, skip next sc, sc in next sc, ch 5, sc in next space, ch 5 †, shell over shell; repeat from * across, end at **; repeat from † to†; join.
Round 4: Slip st in next 2 dc, beginning shell in same dc,* ch 3, skip next sc, sc in next sc, ch 3, shell over shell **,[ch 3, sc in next ch-3 space] twice, ch 3, shell over shell; repeat from * across, end at **; † ch 3, sc in next space, [ch 5, sc in next space] 4 times, ch 3 †, shell over shell; repeat from * across, end at **; repeat from † to †; join.
Round 5: Slip st in next 2 dc; ch 2, holding back last loop on hook, 2 dc in same dc as last slip st, yo and through all 3 loops on hook –beginning cluster made; * ch 1; hold-ing back last loop on hook, 3 dc in 3rd dc of next shell, yo and through all 4 loops on hook –3-dc-cl-cluster made **; ch 4, [sc in next space, ch 3] twice, sc in next space, ch 4, 3-dc-cluster in next shell; repeat from * across, end at **; †ch 5, sc in next space, [ch 6, sc in next space] 5 times, ch5 †, 3-dc-cl in next shell; repeat from * across, end at **; re-peat from † to †; join to top of beginning cluster.
Fasten off.
Round 6: Attach B in the ch-1 space after the joining; ch 1,sc in ch-1 space, * 4 sc in next space, [3 sc in next space] twice, 4 sc in next space, sc in ch-1 space; repeat from *across; (3 sc, 2 hdc) all in next ch-5 space, 6 hdc in next space, 6 dc in next space, (dc, 2 tr, dtr, 2 tr, dc) all in next space, 6 dc in next space, 6 hdc in next space, (2 hdc,3 sc) all in next space **, sc in ch-1 space; repeat from *across, end at **; join to first sc.
Fasten off.
Round 7 - Work all sts in Back Loops: Attach C in back loop of any sc along long edge; ch 3, * dc in next sc and in each sc across, 3 dc in first hdc along side, dc in next 16 sts, (2 dc, ch 2, 2 dc) all in dtr, dc in next 16 sts, 3 dc in next hdc; repeat from * around; dc in each sc to beginning of round; join. Fasten off.
Round 8: Attach B in the center dc of the 3-dc group after an end; ch 1, ** 3 sc in dc, * sc in next dc, tr in front loop of the st below the next dc, (skip dc behind tr) ***, sc in next dc; repeat from * across to next 3-dc group, end at ***; sc in next dc, 3 sc in next dc, † [sc in next dc, tr in front loop of st below next dc, sc in next dc] 6 times, sc in next dc, sc in ch-2 space, tr in front loop of dtr, sc in same ch-2 space,sc in next dc, [sc in next dc, tr in front loop of st below next dc, sc in next dc] 6 times †; repeat from ** to next 3-dc group, end at ***; repeat from † to † once more.
Fasten off.
Weave in ends. With right sides together slip st panels together through back loops from center sc of a 3-sc group along side edge to center sc of next 3-sc group of same long edge.
Weave in ends.

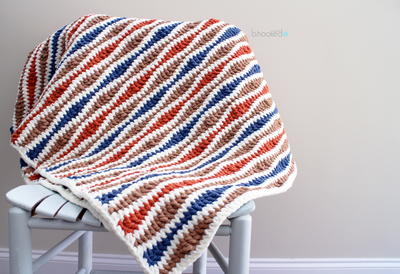
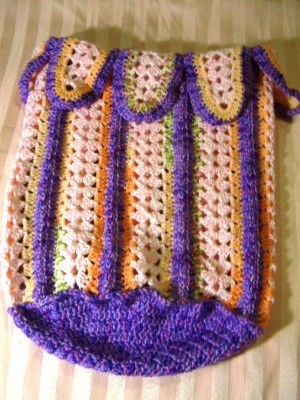
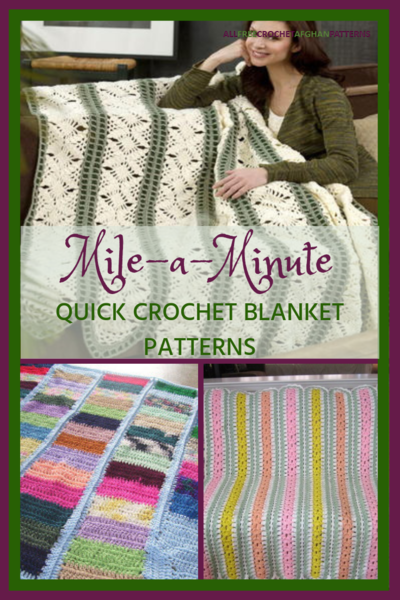
BONUS! More lacy mile-a-minute projects:

Abbreviations:
Read NextFast Irish Panels Throw
Your Recently Viewed Projects
Thanks for your comment. Don't forget to share!
walksinrain 248446 3
Sep 29, 2019
I would love to have a pdf of this pattern. Is there a way to do that?
Kathytop55 7300894
Feb 08, 2019
I've been struggling to make this throw and have no difficulties until I reach Round 7. It indicates dc all the way round, which makes a very solid border, definitely not the open squares border. Then Round 8 puts tcs in front of dcs, which is a 3-D effect, again not the open squares border. I've contacted Red Heart (Coats and Clark) directly and have not gotten a response. I can McGiver the open squares border after Round 6, but that's not the point. I'd like a corrected pattern that ends up looking exactly like the picture!
Pansmith 1399558
Apr 08, 2019
The pattern is correct. Row 7 is worked in dark green, then row 8 is worked in the light green, as used in row 6. The photo appears to show openwork, but if you look carefully, its an optical illusion, as the light green tr stitches in row 8 are worked in front of the dark green dc stitches in row 7. I hope that makes sense and helps a little
Zeemer
Oct 16, 2018
Wow. This Irish Throw is sooooo beautiful. I especially appreciated the design and stitches used when I saw it up closed in the enlarged photo. I will definitely make this project.
tadmans 4832349
Apr 02, 2018
on round one... just wondering do i work (ch3, skip the next3 ch, sc in the next 7 ch, ch3 skip next3 ch,) and repeat or do I do the 5 dc in the next ch?? The pattern has the after the skip 3ch.... and I need dc in row two by reading the pattern. Thanks for your help..Terri
Morehouse17
Feb 28, 2018
This Irish Panels Throw is really beautiful but I do not know about "fast" The directions are provided on a single page and no pictures of the steps are given. The video link is for the edging only. I do not see a list of special crochet stitches but when I read the directions it is clear that there is at least a shell stitch. This is pretty but not for me to make.
Delphine Bryant
Feb 27, 2018
I am always on the scout to learn something new and not that it is new to me, I have yet to make a project with panels. The directions show advanced so this may not be the one but this pattern is really beautiful. Changing color yarns to match your dcor can easily make this a special piece to add to your home.
QuestaGirl54 77084 17
Sep 29, 2017
I would like to make this for a queen-size bed. How much more yarn will I need?
brickleydc
Mar 10, 2017
Beginning in round 2 there is a symbol that started to be used that I am unfamiliar with. Can you please explain what is being used for and how it relates to the pattern? Thank you.
KLC
Mar 13, 2017
Hello. Perhaps looking at the original pattern on Red Heart would help www.redheart.com/free-patterns/dreamy-throw. We also have an active Facebook Group that may have the answers www.facebook.com/AllFreeCrochetAfghanPatterns/posts/1007733495951114 -Thanks, Krista, Editor
Debb
Mar 25, 2017
what is this symbol? I've never seen it before and have no clue what it is.
Debb
Mar 25, 2017
This answer is no help at all...what is " "? The picture is too small to be of any use, and I've googled this everywhere.
KLC
Mar 28, 2017
The pattern does not explain what it means just this: * or ** or *** or = repeat whatever follows the * or ** or *** or as indicated; [] = work directions in brackets the number of times specified. It looks like it means single crochet.
dpsacerich 2358451
Mar 08, 2017
I have just started my first panel and now I'm stuck at the end. I am on Round 1 and just finished the 3 dc, ch 5, 3 dc all in last stitch. Now I don't understand what to do next. I don't know where to start the next stitch. Do I turn? It doesn't seem to be very clear to me. "now work in remaining loops of beginning ch and repeat from across, end at 3 dc in same ch as first 2 dc, ch 5 join with a slip st to top of ch-3." Can someone please help me? Thank you!
KLC
Mar 10, 2017
Hello. Perhaps looking at the original pattern on Red Heart would help www.redheart.com/free-patterns/dreamy-throw. We also have an active Facebook Group that may have the answers www.facebook.com/AllFreeCrochetAfghanPatterns/posts/1007733495951114 -Thanks, Krista, Editor
Debb
Mar 23, 2017
What they should have told you in the pattern is to continue working in back loops!!
Tricia108
Jan 30, 2017
I am always looking for a pattern I can do on the bus or train. This will be perfect. It is so decorative as well. I always drape a throw over my couch. Besides adding a nice touch, it can be easily reached for when you just need a little warmth. Thank you.
boopcapps
Nov 07, 2016
How is the best way to print this out so that I can work from it, and store it in my binder? I don't need all the ads.
ChaCha Rizzo
Feb 04, 2017
Hi Boop - right above the comments box you'll see a row of buttons near the little camera icon. One is a print button. Click that button and a new window should pop up for you to easily print without all the ads. Hope that helps!
mulberrygalprinces s
Aug 16, 2016
This is really very pretty as a throw but I live in Florida and I really don't need it as a throw. So I will make one panel and use it as a table runner. It should show up very well against my dark table top. I know it wasn't designed for that but thank you anyway.
lkap11 4863749
Jun 07, 2016
This is a beautiful afghan, but the pattern, although correct, was difficult to follow until I made a small template of all 5 rows with the off white, using 32-35 chains for the trial (you can undo any extra chains). I also found that 228 chains was way too big so I made round one the size I thought was right (add on 10 inches for rounds 2-8) and undo any unused ch. I ended up with 14 of the 7 sc diamonds and it was 72 inches long. I was worried that I might have made some extra stitches here and there so on the last row I omitted the front tc and just did sc. I also only made 6 panels and it was 52 inches wide.
Zeemer
May 12, 2016
This looks fast to make - mile a minute. Thanks for having the pattern right in front for easy reference. I will pin this pattern. Thanks.
Cheryl Y
Apr 25, 2016
I do like this Fast Irish Panels Throw! The directions are well written for the advance crocheter. I wish I would of seen it back in 2016, to answer a few of the questions asked below. This pattern is worked in the round of the chain. Meaning you don't turn your work, you are working in the other side of the chain. the stitch you will work in will pop up top. This is a beautiful Afghan, I'm thinking of making more panels to add to make it larger for our guest bed. Thank you for this free pattern.
dpsacerich 2358451
Mar 08, 2017
What do you mean by "the stitch you will work in will pop up top"? I understand what you mean about going around, but where do I put the first stitch once chain 3? There is no stitch to go into that I can discern. I thought I was an advanced crocheter myself, having crocheted many afghans and doilies, but nothing like this. Thanks for any help!
Bilunag 9921894
Apr 07, 2016
After first there is thenrepeat again lastly this is can't manage as well as228ch is too much for 7 panel plz help to do. I am very old follower thanks Pratima nag
prairiesweets
Jan 25, 2016
I considered myself an expert crocheter, until this pattern. Is there a turn before starting Round 2. And are the side 1/2 of the single crochets in row one, referred to as double crochets in the second row? Totally befuddled!
ctsheehy 5454627
Dec 03, 2015
When working a complicated pattern, I have found it helpful to WRITE OUT the directions instead of using the abbreviations/shortcuts we ususally see (used to conserve space, among other reasons!). Writing each row to be repeated on its' own index card can also be of help.
thely
Aug 09, 2015
Hi! Could you tell me please how much should I chain, if the current length (228ch) is 1 pattern greater than what I need? Thank you 3
sherliherlien
Jul 21, 2015
You all just need to read the instructions closer - beautiful pattern. No problems here!
ojeda7 2526623
Jul 02, 2015
I don't understand the instructions from round one after 3 dc chain 5 3dc. Help
sandyeckhoff
Jan 29, 2015
I'm into scarfs right now so I went through step 4 and tied off. Lays beautifully!
diana 6137462
Oct 27, 2014
I don't understand the instructions for round 8. If I do the sc, then the tc (treble crochet?) in the front loop of the row below the next dc, I get a 3D look, not the open lace look shown in the pattern. Am I missing something?
nancydilday 910580 7
Sep 12, 2014
want to make a copy of this pattern how do I do it ?????????????????
maureenandbruce 59 38796
Aug 15, 2014
Does need a tutorial as confusing where to go after crocheting to end...Row One....then pattern says to now work in to remaining loops of beginning chain....But I have none after the end chain is worked as is expected when one comes to the end. Perhaps I am supposed to join up to beginning 2dc and form a ring... I'll keep at trying to work it out...
crochetgran48
Aug 16, 2014
maureenandbruce- It means work in the loops on the other side of the chain so you are working all the way around the chain. I hope this helps you.
maureenandbruce 59 38796
Aug 15, 2014
This will be my first project from your wonderful site....Beautiful afghan! Thank you.
soniagalvin 418363 7
Aug 01, 2014
I have not made this yet but I will give it a jolly good try as it looks beautiful
Report Inappropriate Comment
Are you sure you would like to report this comment? It will be flagged for our moderators to take action.
Thank you for taking the time to improve the content on our site.