Country Fields Throw
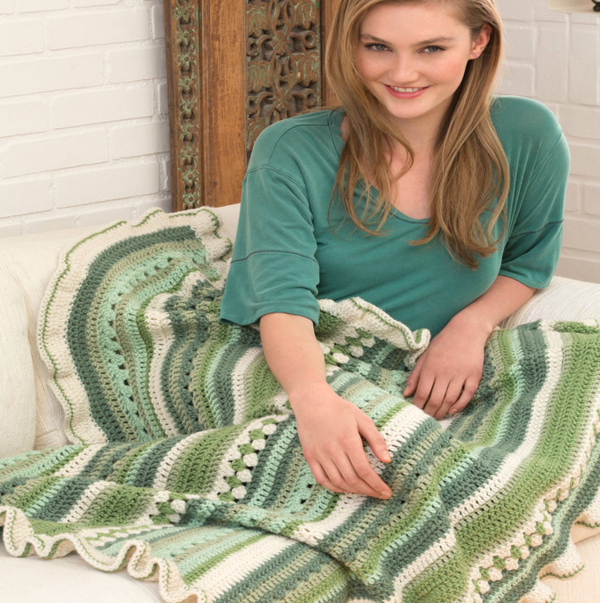
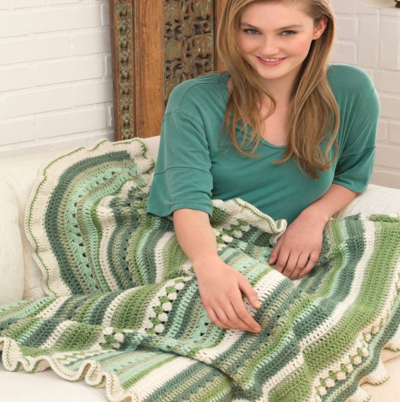
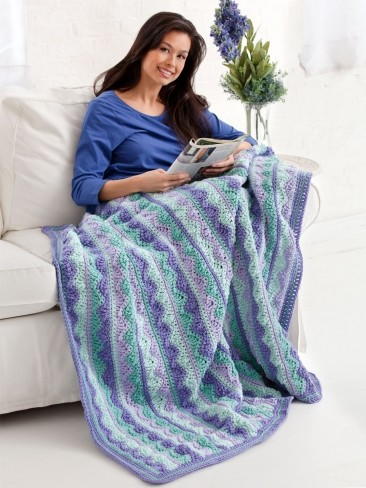
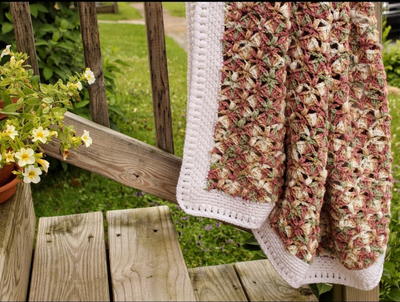
The beauty of the countryside is unlike anything else. The Country Fields Throw has earthy green crochet stripes that remind us of a bright sunny day outside in the grass. Using the crochet slip stitch, this easy crochet pattern has an awesome assortment of stripe designs. A wavy border completes this quaint gem. If you're looking for some amazing Red Heart free patterns, you've got to check out the Country Fields Throw.

Crochet HookI/9 or 5.5 mm hook
Yarn Weight(4) Medium Weight/Worsted Weight and Aran (16-20 stitches to 4 inches)
Materials:
-
RED HEART® Super Saver®: 1 skein each 631 Light Sage A, 668 Honeydew B, 624 Tea Leaf C, and 661 Frosty Green E and 2 skeins 313 Aran D
-
Hook: 5.5mm [US I-9]
-
Yarn needle
Size: 46” wide x 36” long (117 x 91.5 cm), including border.
Gauge: 12 sts = 4” (10 cm); 7 rows = 4” (10 cm), in double crochet. CHECK YOUR GAUGE. Use any size hook to obtain the gauge.
Special Stitches:
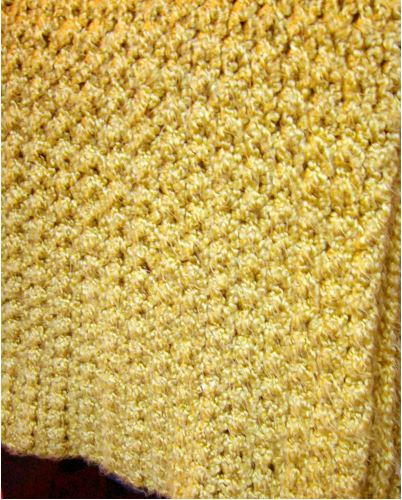
Surface slip st= Insert hook from right side to wrong side and then to right side again around post of indicated stitch, yarn over, draw loop toright side and through loop on hook.
Special Technique: Join with sc = Place slip knot on hook, insert hook in indicated stitch, yarn over and draw up a loop, yarn over and draw through both loops on hook.
Notes: 1.Lapghan is worked back and forth in rows. Lightly ruffled border is made in joinedrounds with right side facing. 2. For a wider or narrower lapghan, increaseor decrease beginning chains in multiplesof 3.3. To change color, work last stitch of old color to last yarn over. Yarn over with new color and draw through all loops on hook to complete stitch. Proceed with new color. Cut old color.
Instructions:
With A, ch 136.
Row1 (right side): Dc in 4th ch from hook (beginning ch counts as first dc) and in ch across, turn—134 dc.
Row 2:Ch 3 (counts as first dc here and throughout), dc in each st to beginning ch, dc in top of beginning ch; change to B, turn.
Row 3: Repeat Row 2; change to A.
Row 4: Repeat Row 2; change to D.
Row 5: Ch 3, skip next dc, 3 dc in next st,*skip next 2 sts, 3 dc in next st; repeat from* to last 3 sts, skip next 2 sts, dc in last st; change to C, turn—134 dc (44 3-dc groups and 2 dc).
Row 6: Ch 3, 2 dc in space between first dc and first 3-dc group (counts as first 3-dc group), *3 dc in space between next two 3-dc groups; repeat from * across; change to D;leave beginning ch unworked, turn—135 dc (45 3-dc groups).
Row 7: Ch 3, *3 dc in space between next two 3-dc groups; repeat from * across, dc in top of beginning ch; change to E, turn—134 dc (443-dc groups and 2 dc).
Rows 8–18: Repeat Row 2 eleven times and change color as in the following color sequence: Work 1 row with E, 3 rows with C,1 row with E, 1 row with D, 2 rows with A, 1row with B, 1 row with C, and 1 row with E;change to A.
Row 19: Repeat Row 5; change to E.
Rows 20–26: Repeat Row 2 seven times and change color as in the following color sequence: Work 1 row with E, 1 row with A, 2 rows with D, 1 row with C, 1 row with B, and 1 row with E; change to B.
Row 27: Repeat Row 5. Do not change color.
Row 28: Repeat Row 6; change to E.
Row 29: Ch 3, dc in each dc to last 2 sts, skip next dc, dc in top of beginning ch; change to A, turn—134 dc.
Rows 30–32: Repeat Row 2 three times and change color as in the following color sequence: Work 1 row with A, 1 row with B, 1 row with A; change to D.
Rows 33–58: Repeat Rows 5–30. Do not change color at end of Row 58.
Row 59: Repeat Row 2. Fasten off.
Border
Round 1 (right side): With right side facing and working across opposite side of foundation ch, join D with sc in first ch, 2 sc in same ch (corner made), sc in each ch across to last ch, 3 sc in last ch (corner made); working across ends of rows of first side, 2 sc in each row; 3 sc in first st (corner made), sc in each st across to last st, 3 sc in last st (corner made); working across ends of rows of other side, 2 sc in each row; join with slip st in first sc—512 sc.
Round 2: Ch 3, dc in same st as join, 2 dc in each st around working 5 dc in center sc of each corner (corner made); join with slip st in top of beginning ch.
Round 3: Ch 3, dc in each st around working 3 dc in center dc of each corner; join with slip st in top of beginning ch.
Round 4: With right side facing, join C with surface slip st around post of any dc, surface slip st around post of each dc; join with slip st in first slip st. Fasten off.
Finishing
Weave in ends.
Read NextDenim and Ivory Crochet Lapghan
Your Recently Viewed Projects
Cheryl Y
Oct 02, 2018
This Country Fields Throw is a beautiful afghan. The written directions sound easy enough, but the Surface slip st has me a little confused. By chance do you have a video showing how to do it? I close up picture of the trim would even work.. Hopefully I can find a video by searching it on the internet. Other than that I'm in.. Thank you so much for sharing this free crochet throw pattern.
AFCAP Editor
Oct 08, 2018
Hey there! Here's the URL for our video detailing surface stitches- https//www.allfreecrochetafghanpatterns.com/Crochet-Afghan-Tutorials/How-to-Crochet-Surface-Stitches -It's not specifically for the slip stitch, but it'll give you the visuals you need to apply the technique to the slip stitch. You can also find all our other videos by clicking on the "Videos" link at the top of the page. Thank you so much for your question! Let me know if I can be of further assistance. Happy Hookin'!
Sharon M
Sep 26, 2017
People like to look at pictures of a project before they make them. Especially when they can't read patterns, like me. So I will NOT be doing this project.
KathrynAllison
Sep 27, 2017
Hello Sharon M, the photo for this pattern has been updated. Our apologies for the inconvenience! -Editors of AllFreeCrochetAfghanPatterns
Zeemer
May 03, 2016
Thanks for making the pattern readily available for crocheters like me. This throw is perfect for someone who loves plants, a green thumb, someone who loves the environment.
Report Inappropriate Comment
Are you sure you would like to report this comment? It will be flagged for our moderators to take action.
Thank you for taking the time to improve the content on our site.

