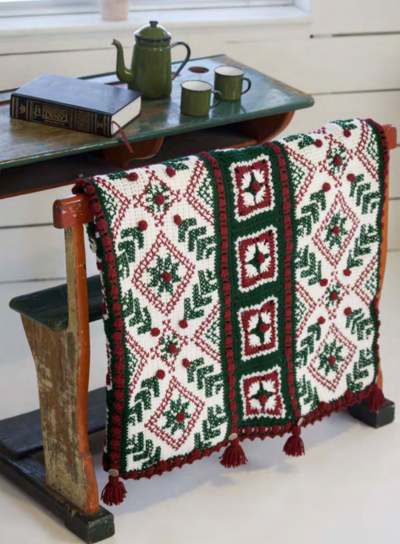
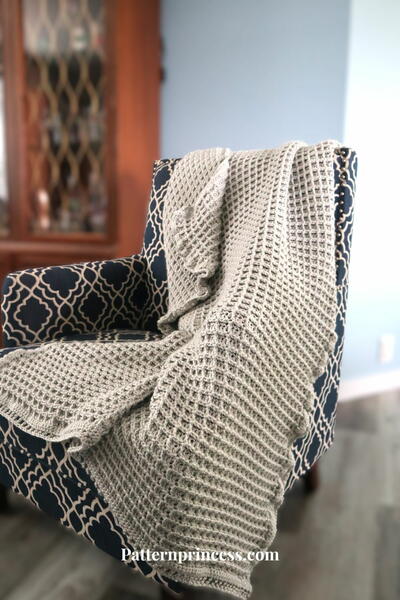
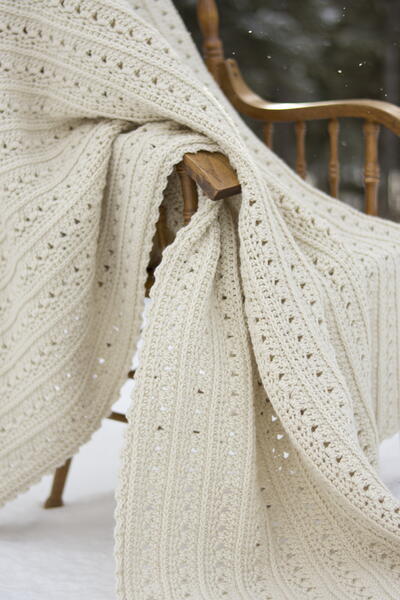
Holly Berries Cable Crochet Throw and Pillow
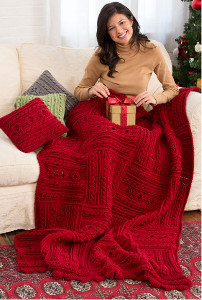
Start a fire and sink into your couch with the coziest Christmas crochet pattern ever. You will never want to leave the comfort of the Holly Berries Cable Crochet Throw and Pillow. The deep red of this cable crochet pattern will add a rich Christmas glow to your home. It even comes with crochet pillow patterns, so you can decorate your whole space. When it comes to free Christmas crochet patterns, this chunky throw is the most divine.

Crochet HookJ/10 or 6 mm hook
Yarn Weight(4) Medium Weight/Worsted Weight and Aran (16-20 stitches to 4 inches)
Materials:
- RED HEART® With Love®: 10 skeins 1909 Holly Berry A, and 1 skein each of 1601 Lettuce B and 1401 Pewter C. Note: Nine skeins of A are needed to make throw only, the other skein of A will make one pillow.
- Hooks: 6mm [US J-10] and 6.5mm [US K-10.5]
- Three, 12 x 12” (30.5 x 30.5 cm) pillow forms
- Six 12½ x 12½” (32 x 32 cm) pieces of fabric in similar color as yarn-two for each pillow (optional – to make a slip cover for pillow)
- Yarn needle
Size: Throw measures 50 x 70” (127 x 178 cm); Pillow measures 12 x 12” (30.5 x 30.5 cm)
Gauge: 12 sts = 4” (10 cm) in single crochet using larger hook. CHECK YOUR GAUGE. Use any size hook to obtain the gauge.
Special Stitches: picot= Ch 3, slip st in 3rd ch from hook, reverse sc (reverse single crochet)= Work single crochet in opposite direction from which you would usually work (left to right if you are right-handed, and right to left if you are left-handed). This stitch is also known as crab stitch. It creates a rope-like twisted single crochet ridge.
Notes: 1. Throw is made from 20 Squares. Square sare arranged as shown in assembly diagram and crocheted together. 2. Pillow is made from 2 Squares.
Throw
SQUARE (Make 20) With larger hook and A, ch 36.
Row1 (wrong side): Sc in 2nd ch from hook and in each ch across, turn—35 sc.
Low Front Ridge
Note: Both rows of the Low Front Ridge are worked into the stitches of the previous row. The first row (Row 2) is worked into the front loops only. The piece is then turned and the next row (Row 3) is worked into the free loops of the same row (the free loops are in the front after the piece is turned).
Row 2 (right side): Ch 1, working in front loops only, skip the first sc, slip st in next sc and in each sc across, slip st in turning ch, turn—35 sc.
Row 3: Ch 1, working in the free loops of sts in same row as Row 2 was worked, do not skip first sc, sc in each sc across (do not workin the turning ch), turn—35 sc.
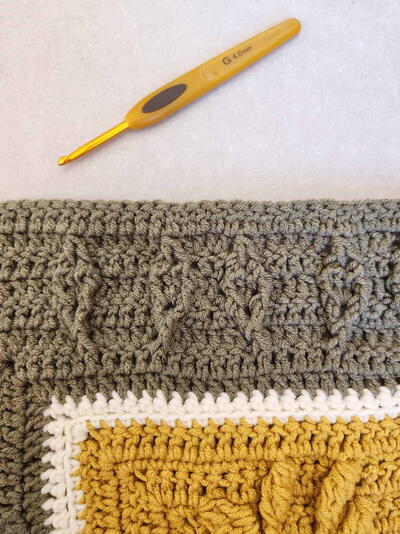
Cable Pattern
Row 4 (right side): Ch 1, sc in first sc, *ch 3, skip next 2 sc of previous row (Row 3), sc in next sc, TURN, work sc in each ch of the ch-3 just made, slip st in the sc that was made just before the ch-3 was made (cable made), TURN; working behind the cable, sc in each of the skipped sc; repeat from * across to last sc,sc in last sc, turn—11 cables. Note: In the next row, you will work a sc in the first and last sc, and 3 sc evenly spaced behind each cable (on wrong side). The 3 sc behind each cable are worked into the stitches that were worked into the 2 skipped sc. Work 2 sc in the first of these stitches and 1 sc in the other. Do not work into the sc of the cables. Push the cables towards the right side of the Throw as you work.
Row 5: Ch 1, sc in first sc, *working in the 2sts “behind” the next cable, 2 sc in next st, scin next st; repeat from * across to last st, sc inlast st, turn—35 sc.
Low Front Ridge
Rows 6 and 7: Repeat Rows 2 and 3.
Row 8: Ch 1, sc in each sc across, do NOT turn.
Reverse Single Crochet Ridge
Note: Both rows of the Reverse Single Crochet Ridge are worked into the stitches of the previous row. The first row (Row 9) is worked into the front loops only. The next row (Row 10) is worked into the free loops of the same row.
Row 9: Working in front loops only, ch 1, skip the first sc, reverse sc in each sc across, slip st in turning ch, do NOT turn.
Row 10: Working in remaining back loops of Row 8, sc in first sc and each sc across, turn.
Row 11: Ch 1, sc in each sc across, turn.
Low Front Ridge
Rows 12 and 13: Work same as Rows 2 and 3.
Cable Pattern
Rows 14 and 15: Work same as Rows 4and 5.
Low Front Ridge
Rows 16 and 17: Work same as Rows 2 and 3.
Shadow Box
Row 18: Ch 2 (does not count as a st), dc in first 4 sts, *skip next 2 sts, tr in next 2 sts, working behind the last 2 sts made, tr in each of the 2 skipped sts, skip next 2 sts, tr in next 2 sts, working in front of the last 2 sts made, tr in each of the 2 skipped sts, dc in next 2 sts; repeat from * 2 more times, dc in last st, turn.
Row 19: Ch 2 (does not count as a st), dc in first 3 sts, *skip next 2 sts, tr in next 2 sts, working behind the last 2 sts made, tr in each of the 2 skipped sts, skip next 2 sts, tr in next 2 sts, working in front of the last 2 sts made, tr in each of the 2 skipped sts, dc in next 2 sts; repeat from * 2 more times, dc in last 2sts, turn.
Rows 20 and 21: Ch 1, sc in each st across, turn.
Rows 22–37: Repeat Rows 2–17. Do not fasten off.
Square Border
Change to smaller hook.
Round 1 (right side): Ch 1, (sc, ch 1, sc) in first sc (first corner made), sc in each st across to last st, (sc, ch 1, sc) in last st (corner made); working in ends of rows, work 33 sc evenly spaced across side edge; working across opposite side of foundation ch, (sc, ch 1, sc) in first ch (corner made), sc in next 33 ch, (sc, ch 1, sc) in last ch (corner made); working in ends of rows, work 33 sc evenly spaced across side edge; join with slip st in first sc—140 sc (35 sc across each side of square) and 4 corner ch-1 spaces. Fasten off.
ASSEMBLY:
Arrange Squares as shown in Assembly Diagram. Crochet edges of five Squares together to make a strip, crocheting neighboring edges of Squares together as follows.
- Hold 2 Squares with wrong sides together (right sides facing out) and stitches of edgeto be joined matching.
- With smaller hook and working through both thicknesses, draw up a loop of yarn in corner at beginning of edge to be joined, work reverse sc all the way across edge to join Squares. Fasten off.
- Repeat to make 4 strips. Crochet long edges of strips together in same manner to form Throw.
Throw Border
Round 1 (right side): With right side facing and smaller hook, join yarn with sc in a corner ch-1 space to work across a short edge, sc in each sc and join between Squares across short edge, (sc, ch 1, sc) in corner ch-1 space, sc in each sc and join between Squares across long edge, (sc, ch 1, sc) in corner ch-1space, sc in each sc and join between Squares across next short edge, (sc, ch 1, sc) in corner ch-1 space, sc in each sc and join between Squares across next long edge, sc in same corner ch-1 space as first sc, ch 1; join with slip st in first sc, do NOT turn—652 sc (145 sc across each short edge, and 181 sc across each long edge) and 4 corner ch-1 spaces.
Round 2: Ch 1, reverse sc in each sc across long edge to corner ch-1 space, TURN (so wrong side is facing), slip st in corner ch-1 space, ch 1, sc in each sc across short edge to next corner ch-1 space, sc in corner ch-1space, ch 1, TURN (so right side is facing), reverse sc in each sc across next long edge to next corner ch-1 space, TURN (so wrong sideis facing), slip st in corner ch-1 space, ch 1,sc in each sc across short edge to beginning ch-1, sc in beginning ch-1, turn—656 sc (146 sc across each short edge and 182 sc across each long edge). Do not fasten off.
Cable Lace Trim
Row 1 (right side): Ch 4 (counts as dc, ch 1), skip first sc, dc in next st, *ch 1, skip next st, dc in next st; repeat from * across short edge, turn; leave remaining sts unworked—74 dc and 73 ch-1 spaces.
Row 2: Ch 1, sc in each dc and ch-1 space across, turn—147 sc.
Low Front Ridge
Row 3: Ch 1, working in front loops only, skip the first sc, slip st in next sc and in each sc across, slip st in turning ch, turn.
Row 4: Ch 1, working in the free loops of sts in same row as Row 3 were worked, do not skip first sc, sc in each sc across (do not work in the turning ch), turn.
Cable Pattern
Row 5: Ch 1, sc in first 2 sc, *ch 3, skip next 2 sc of Row 4, sc in next sc, TURN, work sc in each ch of the ch-3 just made, slip st in the sc that was made just before the ch-3 was made (cable made), TURN; working behind the cable, sc in each of the skipped sc; repeat from *across to last sc, sc in last sc, sc in turning ch, turn—48 cables.
Row 6:Ch 1, sc in first 2 sc, *working in the 2 sts “behind” the cable, 2 sc in next st, sc in next st; repeat from * across, sc in last st, sc in turning ch, turn—148 sc.
Low Front Ridge
Row 7: Ch 1, working in front loops only, skip the first sc, slip st in next sc and in each sc across, slip st in turning ch, turn. Row 8: Ch 1, working in the free loops of sts in same row as Row 7 were worked, do not skip first sc, sc in each sc across (do not workin the turning ch), turn.
Dc-Mesh
Row 9: Ch 4 (counts as dc, ch 1), skip first st, dc in next st, *ch 1, skip next st, dc in next st; repeat from * across, turn—75 dc and 74 ch-1 spaces.
Row 10: Ch 1, sc in first dc, sc in next ch-1space, sc in next dc, *skip next ch-1 space, skip next dc, skip next ch-1 space, (4 tr, picot,4 tr) in next dc, skip next ch-1 space, skip next dc, skip next ch-1 space, sc in next dc; repeat from * across to turning ch-space, sc in turning ch-space, sc in 3rd ch of turning ch—18 (4 tr, picot, 4 tr) groups. Fasten off.
FINISHING THROW Weave in any remaining ends.
PILLOW
(Make 3 – 1 each with A, B, and C)
SQUARES
(Make 2 for each pillow) Make same as Squares for Throw, including Border.
SLIP COVER (optional)
Note: Because color of pillow will show through the stitches in the center, designer recommends sewing a simple slip cover in a similar color for the pillow form before covering with the crocheted squares.Cut 2 pieces of fabric, 12½ x 12½” (32 x 32 cm). Hold the pieces with right sides together. Leaving a ¼” (6 mm) seam allowance, sew 3 sides of fabric squares together. Turn the piece right side out, insert pillow form. Pin the 4th side closed, tucking ¼” (6 mm) seam allowance to the inside and sew closed.
FINISHING PILLOW
Hold the 2 crocheted Squares with wrong sides together (right sides facing outward). With smaller hook, matching yarn color, and working through both thicknesses, draw up a loop of yarn in any corner, ch 1, work reverse sc all the way across 3 sides to join Squares. Insert pillow form and crochet last side closed, join with slip st in beginning ch-1. Fasten off. Weave in any remaining ends.
Read NextSuzy Snowflake Afghan
Your Recently Viewed Projects
Thanks for your comment. Don't forget to share!
Delphine Bryant
Jul 14, 2018
The cable design used to make this Holly Berries cable crochet throw and matching pillow is really spectacular. Look at all of the texture. Now this is my kind of project. The deep red is a true Christmas color and I know anyone on your holiday gift list would love to have one of these.
Morehouse17
Jun 30, 2018
What a deep and luxurious color red. This would be a wonderful addition to any home and not to be just enjoyed during Christmas. With this project being a motif design, I could see myself using different colors of Christmas to make it more festive or just to match the decor in the house.
Report Inappropriate Comment
Are you sure you would like to report this comment? It will be flagged for our moderators to take action.
Thank you for taking the time to improve the content on our site.