Victorian Spirals Crochet Throw
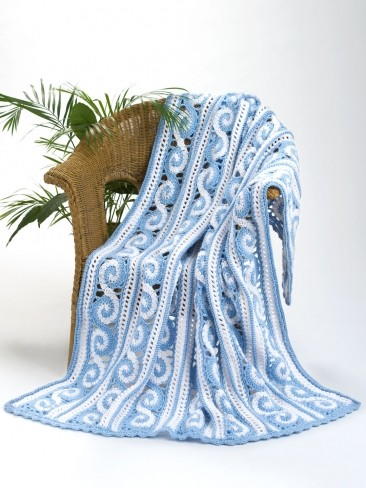
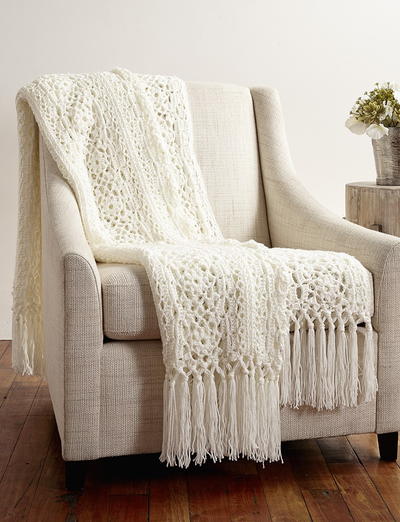
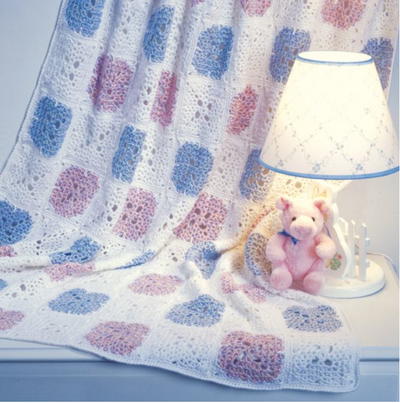
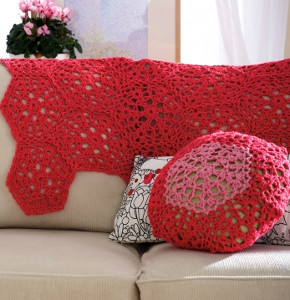
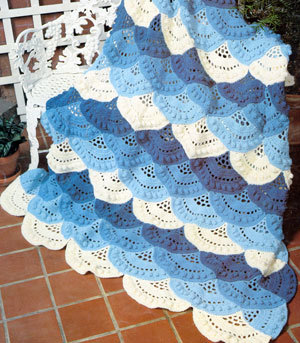
Work up something a little different with the Victorian Spirals Crochet Throw. This intermediate pattern is worked up almost entirely with spiral crochet motifs that are sewn together into panels once complete. Thile mile-a-minute variation makes for an easy portable pattern, so you can work on this anywhere you go, whether it's on a vacation or just passing the afternoon in a park somewhere. Because of the vintage lace design, this light and airy crochet throw will wow in any colors you choose, whether you work it all up in one shade or stick to the two color design, as in the pattern.

Crochet HookJ/10 or 6 mm hook, K/10.5 or 6.5 mm hook
Yarn Weight(4) Medium Weight/Worsted Weight and Aran (16-20 stitches to 4 inches)
Finished SizeApprox. 62"/158 cm wide by 68"/173 cm long
Materials List
- Caron One Pound: Contrast A White (2 skeins), Contrast B Sky Blue (2 skeins)
- One each size US J/10 and K/10 1/2 (6 and 6.5 mm)
- yarn needle
- removable stitch markers, waste yarn (WY) or knitters safety pins (holders)
Pattern
TWO-COLOR SPIRAL (make 98)
Using larger hook and A, wrap yarn around finger to form a ring.
Round 1 (RS): Cont with A, * ch 1, work [sc, hdc, 2 dc] in ring *, remove hook, place last st on holder; join B with a slip st in ring; repeat * to * using B—4 sts in each color, beg in ring.
Round 2: Cont with B, working into sts of A-section, * work [2 dc in sc, 2 dc in hdc, and 2 dc in each dc]—8 sts worked into previous color section *, remove hook, place st on holder;
return to A-st on holder, cont with A, working into sts of B-section, repeat * to *.
Round 3: Cont with A, working into 8-dc of B-section, * work 2 dc in each st—16 sts work into previous color section *, remove hook, place st on holder; return to B-st on holder, cont with
B, repeat * to *.
Round 4: Cont with B, working into dc of A-section, * work 2 dc in each of next 3 dc *, fasten off B; return to A-st on holder, cont with A, working into B-section, repeat * to *. Fasten off A.
NOTE: Two-color Spirals are worked individually, then sewn together into panels. Edging is worked around each panel, along sides of each panel, then panels are joined and final
edging is worked.
AFGHAN
Work 98 Two-Color Spirals.
Sew Spirals together into 7 panels of 14 spirals each, matching colors (see photo); tack down beg and end of Spirals on each panel.
Panel Edging
Note: Because of the scalloped edge, the number of sts may vary on some scallops; use your judgment to space evenly. Short ends are 'squared-off' by working two corners at each
end (dc, ch 3, dc in one st); each Spiral has (dc, [ch-2, sc] 3 times, ch 2, dc along the scallop) and panel ends have (dc [ch-2, sc] twice, ch 2, dc) between corners, with corner dc
counting as first or last dc in these counts, as appropriate.
(RS) With RS facing, using larger hook, join B with a slip st in corner of end spiral (approx 2 sts from join), ready to work along long side.
Round 1: First Spiral –Ch 6 (counts as dc, ch 3), dc in same space—first corner completed, **[ch 2, skip 2, sc in next st] 3 times (approx 4 sts rem before join between first and second
Spirals), ch 2, skip 2 sts, dc in next st—first Spiral side completed (2 sts rem unworked before join); cont along long side, * ch 2, skip first 2 sts of next Spiral, dc in next st (4 sts
unworked at join), [ch 2, skip 2, sc in next st] 3 times, ch 2, skip 2, dc in next st; rep from * for each Spiral to end of panel; work [ch 3, dc] in same space as last dc for corner; working
across end, [ch 2, skip 2, sc in next st] twice, ch 2, + work corner (dc, ch 3, dc in next st); rep from ** for opposite side, end at +, join with a slip st to third ch of beg ch 6, slip st in corner
space.
Round 2:* In corner space, work [3 sc, place a marker (pm), 3 sc]; work 3 sc in each ch-space to next corner; rep from * around, join with a slip st to first st—213 sts each side, 15 sts
each end. Fasten off B.
Side Edging:
With RS facing, cont with larger hook, join A at corner marker, ready to work along long side only.
Row 1: Ch 1, sc in same space as joining; * sc, ch 1, skip 1; rep from * to next marker, end sc in marked space, turn.
Row 2: Ch 2 (counts as dc), work [dc, ch 1] in each ch-1 space across, end dc in last sc, turn.
Row 3: Ch 1, sc in first dc, * ch 1, sc in next ch-space; rep from * across, end last rep sc in top of beg ch.
Fasten off. Work Edging on opposite side of panel. Repeat Side-Edging on rem panels.
Assemble Panels: Place 2 panels tog, with WS's facing. Matching sts along one long side, using larger hook and B, work 1 row Rev sc through both panels, joining them. Fasten off.
Repeat for rem panels.
FINISHING
Weave in ends.
Side Edging: With RS facing, using smaller hook and B, join yarn with a slip st at corner, ready to work along side.
Row 1: Ch 1, sc in each st to corner, do NOT turn.
Row 2: Ch 1,working through the front loops only, work Rev sc across.
Row 3: Ch 1, working through back loops only, work sc across.
Fasten off. Repeat for opposite side edge.
Top and Bottom Edging: With RS facing, using smaller hook and B, join yarn with a slip st at corner, ready to work across end.
Row 1: Ch 1, work sc evenly across. Note: Across Spirals, work [2 sc, dc] or [2 sc, skip 1], as needed to keep piece flat, turn.
Row 2: Ch 1, * sc, ch 3, skip 2; rep from *, end sc in last st, turn.
Row 3: Ch 1, sc in first st, in each ch-3 space work [sc, hdc, dc, hdc, sc], end sc in last st.
Fasten off. Repeat for opposite end.
Blocking: Lay piece on flat surface; spray with water (add a little fabric softener for a softer fabric) and allow to dry
Read NextSpring Lace Crochet Squares Throw

