Queen's Favorite Throw
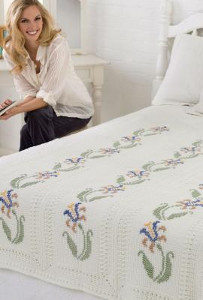
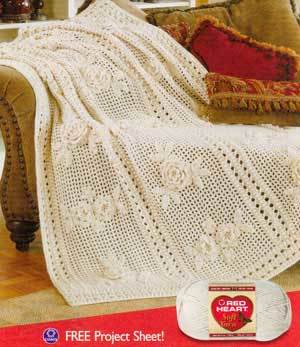
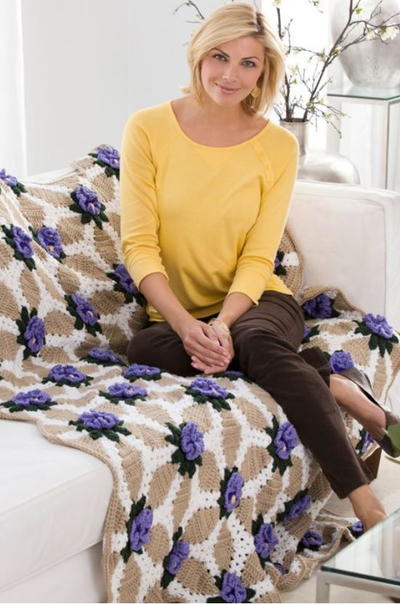
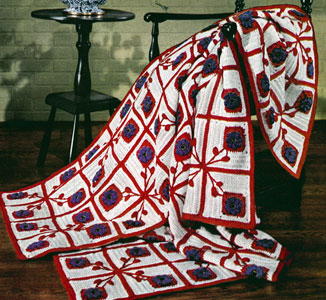
These crochet flowers look like they're straight from the royal gardens. Make the Queen's Favorite throw to add a touch of elegance to your home. This crochet flower pattern is delicate and beautiful. Pastel-colored flowers are arranged in 3 side-by-side panels in this throw. You can spread this over your bed or put it on your favorite armchair! When it comes to crochet blanket patterns, this sophisticated throw is definitely fit for royalty.

Crochet HookJ/10 or 6 mm hook
Yarn Weight(4) Medium Weight/Worsted Weight and Aran (16-20 stitches to 4 inches)
Materials:
- 7 skeins 316 Soft White A, 1 skein each of 382 Country Blue B, 330 Linen C, 320 Cornmeal D, and 661 Frosty Green E
- Hook 6 mm [US J-10]
- Yarn Needle
Size: Throw is 42” x 63”
Gauge: Working in afghan st with afghan crochet hook 16 sts = 4”; 13 rows = 4”. CHECK YOUR GAUGE. Use any size hook to obtain the gauge.
THROW:
Panel (make 3):
With afghan hook, using A, ch 35.
Row 1: Insert hook in 2nd ch from hook, yo, draw yarn through st, *insert hook in next ch, yo, draw yarn through st, repeat from * across (35 loops on hook), yo, draw yarn through 1 loop on hook, **yo, draw yarn through 2 loops on hook, repeat from ** across, 1 loop remains on hook and counts as first loop of next row – 35 sts.
Rows 2-180: Insert hook in next vertical st, yo, draw yarn through st, *insert hook in next vertical st, yo, draw yarn through st, repeat from * across (35 loops on hook), yo, draw yarn through 1 loop on hook, **yo, draw yarn through 2 loops on hook, repeat from ** across, 1 loop remains on hook and counts as first loop of next row.
Row 181: Slip st in each vertical st across. Fasten off.
PANEL BORDER
With right side of Panel facing, using standard crochet hook, join A in row-end st of first row in bottom right cornerof panel.
Round 1: Ch 1, working down length, ***sc in row-end st of first row, *dc in 3rd horizontal bar down of next row, pulling dc up to current level of work, sc in row-end st of next row, repeat from * across length, ch 2, working across top edge, sc in each of next 4 sts, **skip next st, sc in each of next 4 sts, repeat from ** across, skip next st, ch 2, repeat from *** around, join with slip st in first sc.
Round 2: Ch 3 (counts as dc), *skip next dc, dc in next sc, working backwards, dc in last skipped dc, (one cross dc made)*, ***repeat from * to * across length to within last sc, dc in last sc, (2 dc, ch 2, 2 dc) in corner ch-2 space,**skip next sc, dc in next sc, working backwards, dc in last skipped sc**, repeat from ** to ** across, (2 dc, ch 2, 2 dc) in corner ch-2 space***, dc in next sc, repeat from *** to ***around, join with slip st in top of beginning ch-3.
Round 3: Ch 1, sc in first dc, *skip next dc, sc in next dc, working backwards, sc in last skipped dc (one crossed sc made)*, ** repeat from * to * across length to within last 3 dc, sc in each of next 3 dc, (sc, ch 2, sc) in corner ch-2 space, sc in each of next 2 dc, repeat from * to * across to within 2 dc from corner, sc in each of next 2 dc, (sc, ch 2,sc) in corner ch-2 sp**, sc in each of next 3 dc, repeat from** to ** around, sc in each of last 2 dc, join with slip st infirst sc.
Round 4: Ch 1, sc in beginning sc, *skip next sc, sc in next sc, working backwards, sc in last skipped sc*, **repeat from * to * across length to within 4 sc from corner, sc in each of next 4 sc, (sc, ch 2, sc) in corner ch-2 space,sc in each of next 3 sc, repeat from * to * across to within 3 sc from corner, sc in each of next 3 sc, (sc, ch 2, sc) in corner ch-2 space **, sc in each of next 4 sc, repeat from** to ** around, sc in each of last 3 sc, join with slip st in first sc.
Round 5: Ch 1, sc in each sc around, (sc, ch 2, sc) in each corner ch-2 space, join with slip st in first sc. Fasten off.
Embroidery
Follow chart to cross-stitch design onto each panel.
Panel Assembly
With right sides of 2 Panels aligned, slip st panels together on wrong side using back loops, matching sts from corner to corner down length. Repeat for each Panel.
Border
With right side of afghan facing, join White in top right-hand corner sc.
Round 1: Ch 1, *sc in each sc and each ch-space on each side of each joining seam across to corner ch-2 space, (sc,ch 2, sc) in corner ch-2 space, sc in each sc down length to next corner ch-2 space, (sc, ch 2, sc) in corner ch-2 space, rep from * around, join with slip st in first sc.
Round 2: Ch 1, sc in first sc, working backwards, sc in sc to the right of first sc, ** *skip next sc, sc in next sc, working backwards, sc in last skipped sc, repeat from *across to next corner ch-2 space, (sc, ch 2, sc) in corner ch-2 space, join with slip st in first sc.
Round 3: Skip first sc, (slip st, ch 3) in next sc, working backwards, dc in skipped first sc, *skip next sc, dc in next sc, working backwards, dc in last skipped sc*, ** repeat from * to * across to within 1 sc from corner, dc in next sc, (2 dc, ch 2, 2 dc) in corner ch-2 space, dc in next sc, repeat from * to * down length to within 1 sc from corner, dc in next sc, (2 dc, ch 2, 2 dc) in corner ch-2 space, dc in next sc, repeat from ** around, join with slip st in 3rd ch of beginning ch-3.
Round 4: Ch 1, sc in each dc around, working (sc, ch 2,sc) in each corner ch-2 space, join with slip st in first sc. Fasten off. Weave in ends.
Read NextQueen's Favorite Throw
Your Recently Viewed Projects
Zeemer
Aug 24, 2016
Fit for the queen, indeed. The color is subdued, very conservative and laid back which is very appropriate for the queen. Thanks for the pattern which is clearly written complete with photos and diagrams.
Report Inappropriate Comment
Are you sure you would like to report this comment? It will be flagged for our moderators to take action.
Thank you for taking the time to improve the content on our site.


